Remove Adhesive From Car: Expert Guide to Safe & Easy Removal
Removing adhesive from your car can be a frustrating experience. Whether it’s leftover residue from bumper stickers, old badges, or protective films, stubborn adhesive can mar your car’s finish and diminish its appearance. This comprehensive guide provides expert-backed methods and insights to safely and effectively remove adhesive from your car’s surfaces, protecting your paint and restoring its pristine look. We’ll cover everything from identifying the type of adhesive to choosing the right removal techniques and tools, ensuring a damage-free outcome. This isn’t just another quick-fix guide; it’s a deep dive into the science and art of adhesive removal, drawing on years of detailing experience and industry best practices to deliver unparalleled results.
Understanding Automotive Adhesives
Adhesives used on cars are designed for durability and weather resistance, which makes them challenging to remove. Different types of adhesives exist, each requiring a specific approach. Identifying the type of adhesive you’re dealing with is the first crucial step in successful removal. For example, pressure-sensitive adhesives (PSAs), commonly found on stickers and decals, behave differently than structural adhesives used for trim or emblems. Understanding these differences is paramount to selecting the appropriate removal method.
* **Pressure-Sensitive Adhesives (PSAs):** These are the most common and are found on stickers, decals, and some protective films. They typically soften with heat and solvents.
* **Structural Adhesives:** Used for bonding trim, emblems, and body panels. These are much stronger and require specialized solvents or mechanical removal techniques.
* **Acrylic Adhesives:** Known for their high strength and resistance to UV light and chemicals. Often found in automotive tapes.
* **Epoxy Adhesives:** Two-part systems that create a very strong and durable bond. Used in more demanding applications.
Consider the age of the adhesive as well. Fresh adhesive might be easier to remove with gentle solvents, while aged adhesive becomes brittle and may require more aggressive methods. Attempting to remove aged adhesive without proper preparation can lead to paint damage.
Essential Tools and Products for Adhesive Removal
Before tackling the adhesive, gather the necessary tools and products. Using the right tools will not only make the job easier but also minimize the risk of damage to your car’s paint. Here’s a list of essential items:
* **Heat Gun or Hair Dryer:** To soften the adhesive.
* **Plastic Razor Blades or Scrapers:** To gently lift the adhesive without scratching the paint.
* **Microfiber Cloths:** For wiping and buffing.
* **Adhesive Remover:** Specifically designed for automotive use.
* **Isopropyl Alcohol:** For cleaning residue.
* **Detailing Clay Bar:** To remove stubborn adhesive particles.
* **Wax and Polish:** To restore the paint’s shine after removal.
* **Gloves:** To protect your hands from chemicals.
* **Safety Glasses:** To protect your eyes.
Choosing the right adhesive remover is critical. Avoid harsh chemicals that can damage the paint or clear coat. Opt for products specifically formulated for automotive use. These products typically contain solvents that dissolve the adhesive without harming the underlying surface. Always test the product in an inconspicuous area first to ensure compatibility.
Step-by-Step Guide to Removing Adhesive from Car Surfaces
Follow these steps to safely and effectively remove adhesive from your car:
1. **Preparation:** Wash and dry the area around the adhesive to remove any dirt or debris. This prevents scratching during the removal process.
2. **Heating:** Use a heat gun or hair dryer to gently warm the adhesive. Keep the heat gun moving and avoid overheating any one spot. The goal is to soften the adhesive, not to melt it.
3. **Scraping:** Use a plastic razor blade or scraper to gently lift the edge of the adhesive. Work slowly and carefully, applying gentle pressure. Avoid using metal scrapers, as they can easily scratch the paint.
4. **Adhesive Remover Application:** Apply the adhesive remover according to the manufacturer’s instructions. Allow it to dwell for the recommended time to dissolve the adhesive.
5. **Wiping:** Use a clean microfiber cloth to wipe away the dissolved adhesive. Apply gentle pressure and avoid rubbing aggressively.
6. **Residue Removal:** If any residue remains, use isopropyl alcohol to clean the area. Follow up with a detailing clay bar to remove any stubborn particles.
7. **Polishing and Waxing:** Once the adhesive is completely removed, polish and wax the area to restore the paint’s shine and protection.
**Important Considerations:**
* **Paint Condition:** Check the paint’s condition before starting. If the paint is old or damaged, the adhesive removal process may cause further damage. In such cases, consider seeking professional help.
* **Temperature:** Avoid removing adhesive in direct sunlight or extreme temperatures. These conditions can affect the adhesive’s properties and make it more difficult to remove.
* **Patience:** Adhesive removal can be a time-consuming process. Be patient and avoid rushing, as this can lead to mistakes and damage.
Choosing the Right Adhesive Remover: A Product Breakdown
Selecting the appropriate adhesive remover is crucial for achieving optimal results without damaging your car’s finish. Several excellent products are available on the market, each with its own strengths and weaknesses. Here’s a breakdown of some popular options:
* **3M Adhesive Remover:** A widely trusted product known for its effectiveness on various types of adhesives. It’s safe for use on most automotive paints and plastics.
* **Goo Gone Automotive:** A citrus-based remover that’s effective on sticky residues and gentle on surfaces. It’s a good choice for delicate finishes.
* **Krud Kutter Adhesive Remover:** A powerful cleaner that can remove tough adhesives, including those from stickers, labels, and tapes. It’s important to test this product in an inconspicuous area before use, as it can be aggressive on some surfaces.
* **Meguiar’s Adhesive Remover:** Formulated specifically for automotive use, this remover is safe on clear coats and effectively removes adhesive residue.
* **WD-40:** While not specifically designed as an adhesive remover, WD-40 can be effective on some types of adhesive. It’s a good option for removing light residue and lubricating surfaces.
When choosing an adhesive remover, consider the type of adhesive you’re dealing with, the surface you’re working on, and the product’s safety profile. Always follow the manufacturer’s instructions and test the product in an inconspicuous area before use.
Protecting Your Car’s Paint During Adhesive Removal
Protecting your car’s paint is paramount during the adhesive removal process. Improper techniques or harsh chemicals can easily damage the clear coat, leading to discoloration, scratches, or even paint peeling. Here are some essential tips to safeguard your car’s finish:
* **Use Plastic Tools:** Opt for plastic razor blades or scrapers instead of metal ones. Plastic tools are less likely to scratch the paint.
* **Apply Gentle Pressure:** Avoid applying excessive pressure when scraping or wiping. Let the adhesive remover do the work.
* **Test Products First:** Always test adhesive removers and other chemicals in an inconspicuous area before applying them to the entire surface.
* **Keep the Surface Lubricated:** Use plenty of adhesive remover or lubricant to keep the surface wet and prevent friction.
* **Work in Small Sections:** Focus on small areas at a time to maintain control and avoid overworking the surface.
* **Use Microfiber Cloths:** Microfiber cloths are soft and non-abrasive, making them ideal for wiping and buffing.
* **Avoid Abrasive Cleaners:** Stay away from abrasive cleaners or scouring pads, as they can easily scratch the paint.
By following these precautions, you can minimize the risk of damage and ensure a successful adhesive removal process.
Removing Specific Types of Automotive Adhesive
Different types of adhesive require different removal strategies. Here’s a guide to removing some common types of automotive adhesive:
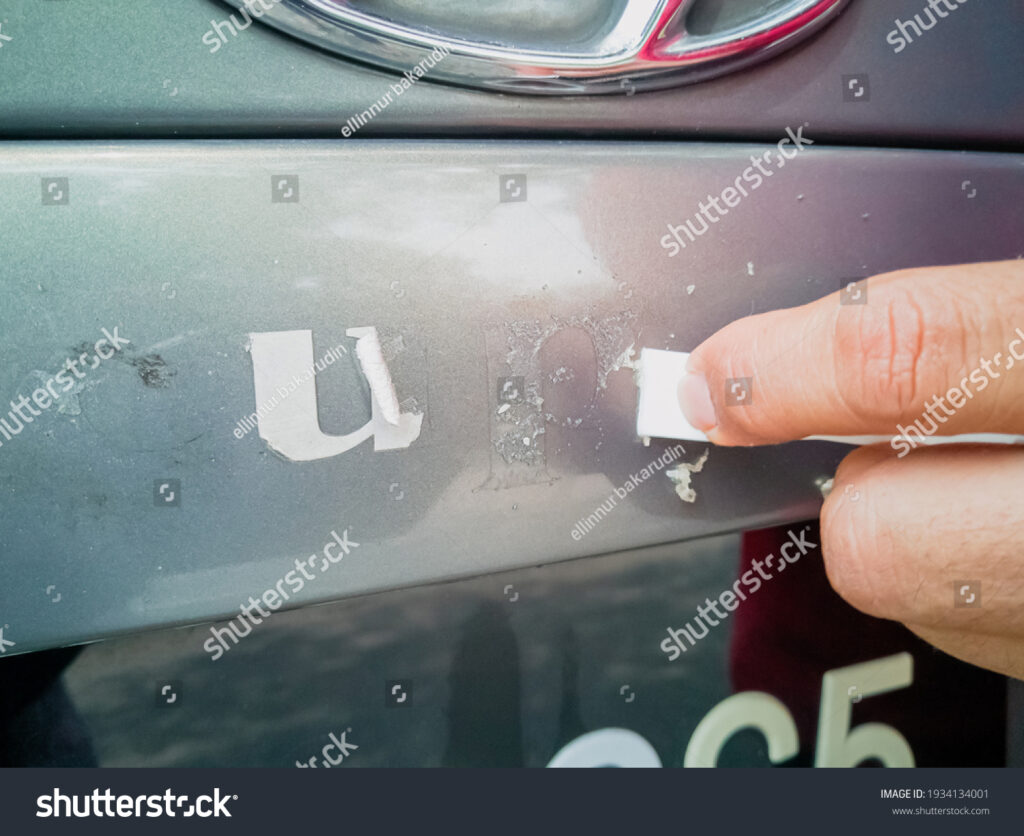
* **Sticker Residue:** Heat the residue with a heat gun or hair dryer, then apply adhesive remover and wipe away with a microfiber cloth. Use a detailing clay bar for stubborn residue.
* **Tape Residue:** Apply adhesive remover and allow it to dwell for the recommended time. Use a plastic scraper to gently lift the residue.
* **Emblem Adhesive:** Heat the emblem with a heat gun and use fishing line or dental floss to carefully separate it from the car. Apply adhesive remover to remove any remaining residue.
* **Window Tint Adhesive:** Use a steamer to soften the adhesive, then peel off the tint. Apply adhesive remover to remove any remaining residue.
* **Road Tar:** Use a tar remover specifically designed for automotive use. Apply the remover and allow it to dwell for the recommended time, then wipe away with a microfiber cloth.
For each type of adhesive, it’s essential to use the appropriate removal method and product to avoid damage to your car’s finish. In our experience, patience and careful application are key to achieving the best results.
Beyond Products: DIY Adhesive Removal Solutions
While commercial adhesive removers are often the most effective solution, several DIY alternatives can be used for removing adhesive from your car. These options may be suitable for light residue or when you don’t have access to specialized products. Here are a few DIY solutions to consider:
* **Vinegar:** White vinegar is a mild acid that can help dissolve some types of adhesive. Apply vinegar to the residue, let it sit for a few minutes, and then wipe away with a cloth.
* **Baking Soda Paste:** Mix baking soda with water to create a paste. Apply the paste to the residue, let it dry, and then wipe away with a cloth. Baking soda is mildly abrasive and can help remove stubborn residue.
* **Peanut Butter:** The oils in peanut butter can help dissolve some types of adhesive. Apply peanut butter to the residue, let it sit for a few minutes, and then wipe away with a cloth.
* **Cooking Oil:** Similar to peanut butter, cooking oil can help dissolve some types of adhesive. Apply oil to the residue, let it sit for a few minutes, and then wipe away with a cloth.
* **Hair Dryer and Soap:** Heat the residue with a hair dryer, then apply soapy water and wipe away with a cloth. The heat helps soften the adhesive, while the soap helps to lift it.
It’s important to note that DIY solutions may not be as effective as commercial adhesive removers, and they may require more effort and time. Always test DIY solutions in an inconspicuous area before applying them to the entire surface.
Professional Automotive Detailing: When to Seek Expert Help
While many adhesive removal tasks can be handled at home, there are situations where it’s best to seek professional help from an automotive detailing expert. Here are some scenarios where professional assistance is recommended:
* **Extensive Adhesive Damage:** If the adhesive covers a large area or has caused significant damage to the paint, professional detailing is the best option.
* **Difficult-to-Remove Adhesives:** Some adhesives, such as those used for structural bonding, are extremely difficult to remove and require specialized tools and techniques.
* **Delicate Finishes:** If your car has a delicate or custom paint finish, it’s best to leave the adhesive removal to professionals who have experience working with such finishes.
* **Lack of Experience:** If you’re unsure about the adhesive removal process or don’t have the necessary tools and products, it’s better to seek professional help to avoid damaging your car.
* **Time Constraints:** If you don’t have the time or patience to tackle the adhesive removal task yourself, professional detailing can save you time and effort.
A professional automotive detailer has the expertise, tools, and products to safely and effectively remove adhesive from your car without damaging the paint or finish. They can also provide additional services, such as paint correction and protection, to restore your car’s appearance.
Maintaining Your Car’s Finish After Adhesive Removal
Once you’ve successfully removed the adhesive from your car, it’s important to maintain the finish to prevent future damage and keep your car looking its best. Here are some tips for maintaining your car’s finish after adhesive removal:
* **Wash Your Car Regularly:** Regular washing helps remove dirt, debris, and contaminants that can damage the paint.
* **Wax Your Car Periodically:** Waxing provides a protective layer that shields the paint from UV rays, oxidation, and other environmental factors.
* **Use a Paint Sealant:** Paint sealants offer long-lasting protection and can help prevent adhesive from sticking to the paint.
* **Apply a Ceramic Coating:** Ceramic coatings provide superior protection and can make it easier to remove adhesive in the future.
* **Avoid Harsh Chemicals:** Use automotive-specific cleaning products and avoid harsh chemicals that can damage the paint.
* **Park in the Shade:** Parking in the shade can help protect the paint from UV rays and prevent the adhesive from becoming brittle.
* **Address Issues Promptly:** If you notice any new adhesive or residue, address it promptly to prevent it from becoming difficult to remove.
By following these maintenance tips, you can keep your car’s finish looking its best and prevent future adhesive-related issues.
Q&A: Expert Answers to Common Adhesive Removal Questions
Here are some frequently asked questions about removing adhesive from cars, along with expert answers:
**Q1: What’s the best way to remove old, hardened adhesive from a car?**
A1: The best approach involves a combination of heat (from a heat gun or hair dryer) to soften the adhesive, followed by a dedicated automotive adhesive remover. Allow the remover to dwell according to the product instructions, then gently scrape with a plastic razor blade. A detailing clay bar can help remove any remaining residue.
**Q2: Can I use household products like acetone or nail polish remover to remove adhesive?**
A2: While acetone and nail polish remover might work on some adhesives, they can be harmful to your car’s paint and clear coat. It’s best to avoid these products and use automotive-specific adhesive removers instead.
**Q3: How can I prevent scratching the paint while removing adhesive?**
A3: To prevent scratching, use plastic razor blades or scrapers, apply gentle pressure, keep the surface lubricated with adhesive remover, and use microfiber cloths for wiping. Avoid metal tools and abrasive cleaners.
**Q4: What should I do if the adhesive remover damages the paint?**
A4: If the adhesive remover damages the paint, stop using it immediately and seek professional help from an automotive detailing expert. They can assess the damage and provide appropriate repairs.
**Q5: Is it safe to use a heat gun on my car’s paint?**
A5: Yes, it’s generally safe to use a heat gun on your car’s paint, but it’s important to use it carefully and avoid overheating any one spot. Keep the heat gun moving and maintain a safe distance from the surface.
**Q6: How long should I let the adhesive remover dwell on the adhesive?**
A6: Follow the manufacturer’s instructions for the specific adhesive remover you’re using. Dwell times typically range from a few minutes to 15-20 minutes, depending on the product and the type of adhesive.
**Q7: What’s the best way to remove adhesive from plastic trim?**
A7: Use a plastic-safe adhesive remover and follow the same steps as for paint, but be extra cautious to avoid scratching the plastic. Test the remover in an inconspicuous area first to ensure compatibility.
**Q8: Can I use a pressure washer to remove adhesive?**
A8: While a pressure washer might remove some loose adhesive, it’s not recommended for removing stubborn or hardened adhesive. The high pressure can damage the paint and force adhesive particles into the surface.
**Q9: What’s the difference between adhesive remover and tar remover?**
A9: Adhesive removers are designed to dissolve adhesive residue, while tar removers are formulated to dissolve tar, asphalt, and other oily substances. While some products may work on both, it’s best to use a product specifically designed for the type of residue you’re dealing with.
**Q10: How can I protect my car from future adhesive problems?**
A10: Protect your car from future adhesive problems by using a paint sealant or ceramic coating, parking in the shade, and addressing any new adhesive or residue promptly.
Conclusion: Mastering Adhesive Removal for a Flawless Finish
Removing adhesive from your car doesn’t have to be a daunting task. By understanding the types of adhesives, using the right tools and products, and following the steps outlined in this guide, you can safely and effectively remove adhesive without damaging your car’s finish. Remember to prioritize patience, gentle techniques, and the protection of your paint. Whether you’re dealing with stubborn sticker residue, old tape marks, or emblem adhesive, the expert advice and DIY solutions provided here will empower you to achieve a flawless finish. We encourage you to share your own experiences and tips for removing adhesive from cars in the comments below. Your insights can help others tackle this common automotive challenge and maintain the beauty of their vehicles. Ready to take your car detailing skills to the next level? Explore our advanced guide to paint correction and protection for even more expert tips and techniques.
